What Chatter Actually Is
Chatter in cylindrical grinding is regenerative vibration. The mechanism, briefly:
The grinding wheel contacts the rotating workpiece.
Each grit cuts a chip of varying thickness because the surface has waviness from the previous pass.
Variable chip thickness creates variable cutting force.
Variable cutting force excites the wheel–workpiece system at its natural frequency.
At the right speed, the excitation reinforces the waviness, and the wave grows.
The wave on the surface becomes a regular pattern of peaks and valleys, with a spacing equal to the workpiece surface speed divided by the vibration frequency.
The visible symptom is a regular wave pattern on the ground surface. The audible symptom is a high-pitched singing or screeching noise during cutting. Both mean the same: the wheel is bouncing on the workpiece at a frequency close to the system's natural frequency.
Chatter is annoying and ruinous. It produces parts out of tolerance, ruins wheel life, and makes a sound that operators learn to hate. This guide explains how to diagnose which type of chatter you have and how to fix it. For related grinding defects, see Grinding Burn and Thermal Damage.
The Three Types of Chatter
Not all chatter is the same. Knowing which type you have speeds up the fix:
Regenerative chatter (most common). Caused by overlap between successive grit contact zones on the rotating workpiece. The wave pattern spacing is a function of the workpiece surface speed and the vibration frequency.
Mode-coupling chatter. Caused by interaction between vibration modes in the system. Less common, requires a finite-element analysis of the wheelhead and workpiece to diagnose.
Resonance chatter. Caused by excitation at the natural frequency of a structural element (wheel spindle, workhead, workpiece itself). Fixable by changing operating speed or stiffening the resonating element.
In practice, you do not need to distinguish the three. The fixes overlap. The diagnostic is the same: identify the vibration source and remove it.
Why Chatter Happens: The Underlying Conditions
Chatter requires three things to occur simultaneously:
A wheel that is harder than the process needs. A hard wheel does not release dull grains. The dull grains rub instead of cut. The cutting force varies. The system is excited.
A system with insufficient rigidity. A wheelhead with low static stiffness deflects more under cutting force. The deflection shows up as variable chip thickness on the next grit pass.
An operating speed that excites the natural frequency. Every grinding system has a natural frequency (typically 50–500 Hz). At certain wheel speeds, the excitation frequency matches the natural frequency and chatter begins.
Remove any one of the three and chatter stops. The art is figuring out which lever is easiest to pull.
Symptom-Based Diagnosis
The first step is recognizing which condition is in play. The symptoms tell you:
Wave pattern spacing matches the workpiece speed and vibration frequency. Regenerative chatter.
Wave pattern spacing matches the wheel speed. Mode-coupling chatter.
Chatter appears only at certain wheel speeds. Resonance chatter — speed away from it.
Chatter appears on every part at every speed. Wheel too hard for material — change the wheel.
Chatter appeared after a machine change or setup change. Setup rigidity — stiffen the setup.
Chatter is intermittent. Wheel loading or coolant flow issue — dress more often, check coolant.
The Chatter Wave Number
Engineers describe chatter by the wave number — the number of waves around the circumference of the part. Counting waves on the ground surface tells you which type of chatter you have:
Low wave count (3–7): Coarse chatter, often from a wide-contact wheel on a flexible setup. Fix with a coarser wheel, narrower contact.
Medium wave count (8–30): Regenerative chatter, the most common. Fix with softer wheel, lower infeed, or stiffer setup.
High wave count (50–200): Fine chatter, often from wheel loading or grit interaction. Fix with dressing discipline and coarser grit.
Counting waves takes 30 seconds with a 10x magnifier and a flashlight. It is the single most useful diagnostic step.
Fix 1: Switch to a Softer Wheel Grade
This is the cheapest fix and the most often correct. Move the grade one or two letters softer:
K to J
J to I
H to G
A softer wheel releases dull grains faster. Each grit does less work before breaking out. The cutting force is more uniform. The excitation drops. The chatter stops or starts.
Trade-off: softer wheels wear faster. You will replace the wheel more often. The cost per wheel life is roughly equal; the cost per part is roughly equal; the wheel changeover adds some operator time.
Fix 2: Switch to a Coarser Grit
Coarser grits cut thicker chips. Thicker chips generate more cutting force and less rubbing. The ratio of cutting to rubbing force improves, and the excitation drops.
Common moves:
100 grit to 80 grit
80 grit to 60 grit
60 grit to 46 grit
Trade-off: surface finish gets rougher. Ra typically goes up by 30–60% per grit step. If the surface finish is at the upper limit of the spec, this fix is not available to you.
Fix 3: Lower the Infeed
Lighter cuts generate less cutting force. Less force, less excitation. Move from 0.01 mm/pass to 0.005 mm/pass, or from 0.005 mm to 0.002 mm/pass.
Trade-off: cycle time goes up. A 50% reduction in infeed roughly doubles the number of passes. On a single-part job this is irrelevant; on production it costs money.
Fix 4: Change Wheel Speed
Every
grinding system has multiple natural frequencies. At certain wheel speeds, the excitation frequency matches one of them and chatter starts. Move the wheel speed up or down by 10–20% and the excitation moves off the natural frequency.
How to find the right speed:
Run the wheel at the current speed until chatter appears.
Slow the wheel by 10% and run again. If chatter stops, you found a stable speed below the original.
If chatter continues, slow by another 10%.
If chatter continues below 50% of the original speed, switch to a different fix (wheel grade or grit).
Trade-off: changing wheel speed changes the cutting conditions. The surface finish and the chip morphology may change. Re-verify the part spec at the new speed before approving production.
Fix 5: Stiffen the Setup
The setup includes the wheel, the wheel spindle, the steady-rest if any, the workhead bearings, and the workpiece fixturing. Each contributes to this system stiffness. Identifying the weak one is part diagnostic, part experiment:
Wheel spindle bearings. Runout above 0.005 mm means worn bearings. Replace.
Wheel flanges. Loose flanges or wrong-size flanges reduce stiffness. Use the manufacturer-supplied flanges, torqued to spec.
Steady-rest. On long slender parts, a loose steady-rest shoe lets the part deflect. Tighten the shoe or use a wider contact.
Workhead bearings. Runout above 0.003 mm means worn bearings. Replace.
Workpiece fixturing. A loose part in the chuck deflects under cutting force. Use a firmer chuck, a softer jaw, or a mandrel.
Machine foundation. A grinder on a soft floor or on an isolation pad that is too soft can deflect. Use a rigid foundation; minimize soft pads.
Trade-off: stiffening costs — bearings, mandfi setup, foundation work. These are real capital expenses.
Fix 6: Use a Wider or Narrower Wheel
The contact width between wheel and workpiece changes the system dynamics. A wider contact puts more grits in cut at once, which generally reduces excitation. A narrower contact puts fewer grits in cut, which can reduce or increase chatter depending on the system.
Try a wider wheel (say, from 20 mm to 25 mm wide) and see if chatter reduces. If it does not, try a narrower wheel. One of the two directions will help.
Fix 7: Use a Different Bond or Abrasive
Some bonds and abrasives are inherently less chatter-prone:
CBN on hardened steel is much less chatter-prone than aluminum oxide. CBN grits are sharper, cut cleaner, and generate more uniform cutting force.
Porous vitrified bonds (high-structure wheels) generate less rubbing friction and less chatter.
Resin bonds are more compliant than vitrified, which can damp vibration but also can amplify at certain frequencies. Trial-and-error.
CBN is the right answer for high-volume hardened steel above 50 HRC where aluminum oxide chatter is a recurring problem. For other materials and other situations, try porous vitrified first.
Fix 8: Use a Steady Rest Correctly
On long slender parts (length-to-diameter ratio above 5:1), a steady rest is mandatory. Set it up wrong and you get chatter instead of stiffness:
The steady-rest shoe must contact the part lightly. Heavy pressure loads the part and may deflect it.
The shoe position must be at the midpoint of the ground journal, or close to it.
The shoe must be a clean, smooth contact. Dirty or worn shoes generate friction that excites chatter.
The shoe material must be appropriate for the workpiece. Bronze for steel, plastic for non-ferrous, ceramic for hardened steel.
For very slender parts, use two or three steady rests positioned along the part's length.
Chatter Fix Priority Order
When chatter appears, walk through the fixes in this order. The cheapest fix that works is the right fix:
Confirm coolant flow and nozzle alignment (free, takes 5 minutes).
Try a softer wheel grade (one letter softer, costs $0).
Try a coarser grit (one step coarser, costs $0).
Reduce infeed by 30% (costs cycle time).
Try a different wheel speed (free).
Check setup rigidity (free diagnostic, $ for fix).
Try CBN (capital cost).
Most chatter stops by step 3. Steps 4–6 handle the rest. Step 7 is for production-volume situations.
Common Mistakes in Diagnosing Chatter
Assuming chatter is a wheel problem when it is a setup problem. A new wheel on the same setup chatters the same way. Check the setup first.
Assuming chatter is a setup problem when it is a wheel problem. A perfectly stiff setup chatters with the wrong wheel. Try a different wheel first.
Changing multiple parameters at once. Change one parameter at a time and observe the result. Otherwise you do not know which change helped.
Not checking the coolant. Insufficient coolant flow is a common cause of chatter-like symptoms (actually, it is burn or loading, not chatter). Verify the coolant first.
Replacing the wheel when the wheel is not the problem. A new wheel chatters the same way on a chatter-prone setup.
Chatter on Different Machines
The general principles are the same on cylindrical, centerless, and internal grinders. The specifics differ:
Cylindrical grinders: Chatter is most often from the wheel–workpiece interaction. Fix with softer wheel, coarser grit, lower infeed.
Centerless grinders: Chatter is most often from the workrest blade. A loose blade or wrong blade angle excites the part. Fix by re-setting the blade.
Internal grinders: Chatter is most often from the spindle deflection on long overhang. Fix by shortening overhang (smaller wheel), stiffening the spindle, or reducing infeed.
CNC grinders: Chatter can come from servo instability. The controller's following error may excite the system. Reduce the servo gain or the acceleration ramp.
For internal grinder chatter specifically, see Internal Cylindrical Grinding.
Measuring Chatter
For engineers who want quantitative data, three measurement methods exist:
Surface profilometer trace. A high-resolution surface profilometer (e.g., Taylor Hobson, Mahr) shows the wave pattern directly. Counts the waves and measures the amplitude.
Accelerometer on the wheelhead. A small accelerometer mounted on the wheelhead measures vibration. FFT analysis shows the dominant frequency, which identifies the resonance.
Acoustic emission sensor. An AE sensor on the workpiece picks up the chatter frequency. Used in production for real-time chatter detection.
For most production environments, the visual and audible diagnosis is sufficient. Quantitative methods are reserved for new process setup, problem diagnosis on critical parts, and research.
Process Documentation
When you fix chatter on a particular part, document the fix. A one-page process sheet should include:
Material and hardness
Wheel specification (full marking)
Wheel speed (m/s)
Workpiece speed (RPM)
Infeed per pass (mm)
Number of passes
Coolant flow (L/min) and pressure (bar)
Dress depth (mm) and frequency (parts per dress)
Pin it next to the machine. When the next operator sees chatter, they have a baseline to revert to. When the customer auditor visits, you have the documented process.
FAQ
Q: What does chatter look like on a ground surface?
A: A regular wave pattern on the surface, with peaks and valleys spaced equally around the circumference. The wave spacing is the workpiece surface speed divided by the chatter frequency, typically 0.1–1.0 mm wave spacing. The pattern is visible to the naked eye under good lighting.
Q: What does chatter sound like?
A: A high-pitched singing, screeching, or squealing noise during cutting. Distinct from the normal grinding hiss and from the dull thud of wheel loading. Operators typically recognize it immediately.
Q: Can chatter damage the part?
A: Yes. Chatter marks are geometric deviations from the cylindrical form. A part with chatter will fail roundness and surface finish specifications, and may be scrap. Severe chatter can also damage the wheel, the spindle bearings, and the workpiece fixture.
Q: Is chatter the same as vibration?
A: Chatter is a specific kind of vibration — regenerative vibration between successive grit contact zones. Other vibrations exist (machine vibration, spindle vibration from imbalance), but those do not produce the regular wave pattern on the ground surface. Chatter specifically refers to regenerative vibration.
Q: Can chatter be prevented entirely?
A: Yes, with the right combination of wheel, parameters, and setup. Most chatter problems are caused by suboptimal combinations that can be fixed. Some parts (very slender, very hard material, very tight tolerance) are inherently chatter-prone and require careful setup.
Q: Why does chatter appear only on some parts in a batch?
A: Most often because the wheel is wearing. As the wheel wears, the contact zone changes, the system dynamics change, and chatter appears at a certain point in the wheel life. Dress more often. Or, less commonly, because some parts in the batch are slightly different (hardness, geometry, fixturing).
Q: Does chatter affect fatigue life?
A: Yes, similar to burn. Chatter marks are stress concentrators and reduce fatigue life by 30–70% vs a smooth ground surface. Like burn, the surface looks fine until the part fails in service.
Q: What is the difference between chatter and wheel loading?
A: Wheel loading is material stuck in the wheel face. It changes the cutting action but does not produce the regular wave pattern. Chatter is a vibration phenomenon. The two are sometimes confused because both can produce a noisy grinding operation. To distinguish: look at the surface. Loading produces a glazed appearance; chatter produces a regular wave pattern.
Bottom Line
Chatter is regenerative vibration between the wheel and the part. Three conditions combine to cause it: wheel too hard for the material, insufficient system rigidity, or operating speed at the wrong frequency. Fix the cheapest lever first: softer wheel grade, coarser grit, or lower infeed. Most chatter stops within the first three fixes.
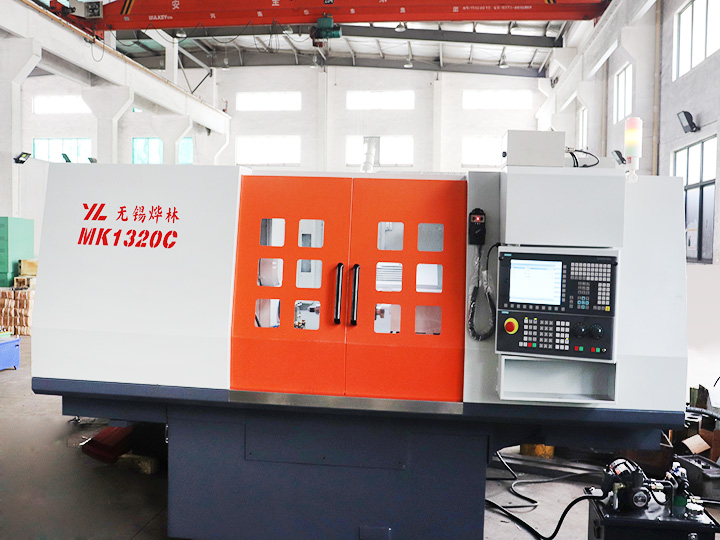
For related problems, see Grinding Burn and Thermal Damage and Grinding Wheel Selection. For machine selection, see the full Yelin CNC cylindrical grinder line or contact our engineering team.
 English